Bulb Planting 101: How to Plant Fall Bulbs for Spring Color
If you want tulips, daffodils, hyacinths to fill your beds next spring, you need to start planning NOW! Fall is the perfect season to start planning and planting bulbs that will surprise you with their cheerful blooms when winter gives way to warmer days. Fall bulb planting might just be one of the most rewarding garden chores you’ll do all year. The real reward happens when those first green shoots start to sprout after a long, brown winter!
Let me walk you through how I prep and plant for a colorful spring garden, plus a few of my favorite tools and tricks to make the job easy and fun. If you need the quick version, I’ll share this infographic first. If you want more in-depth details, keep scrolling for more!
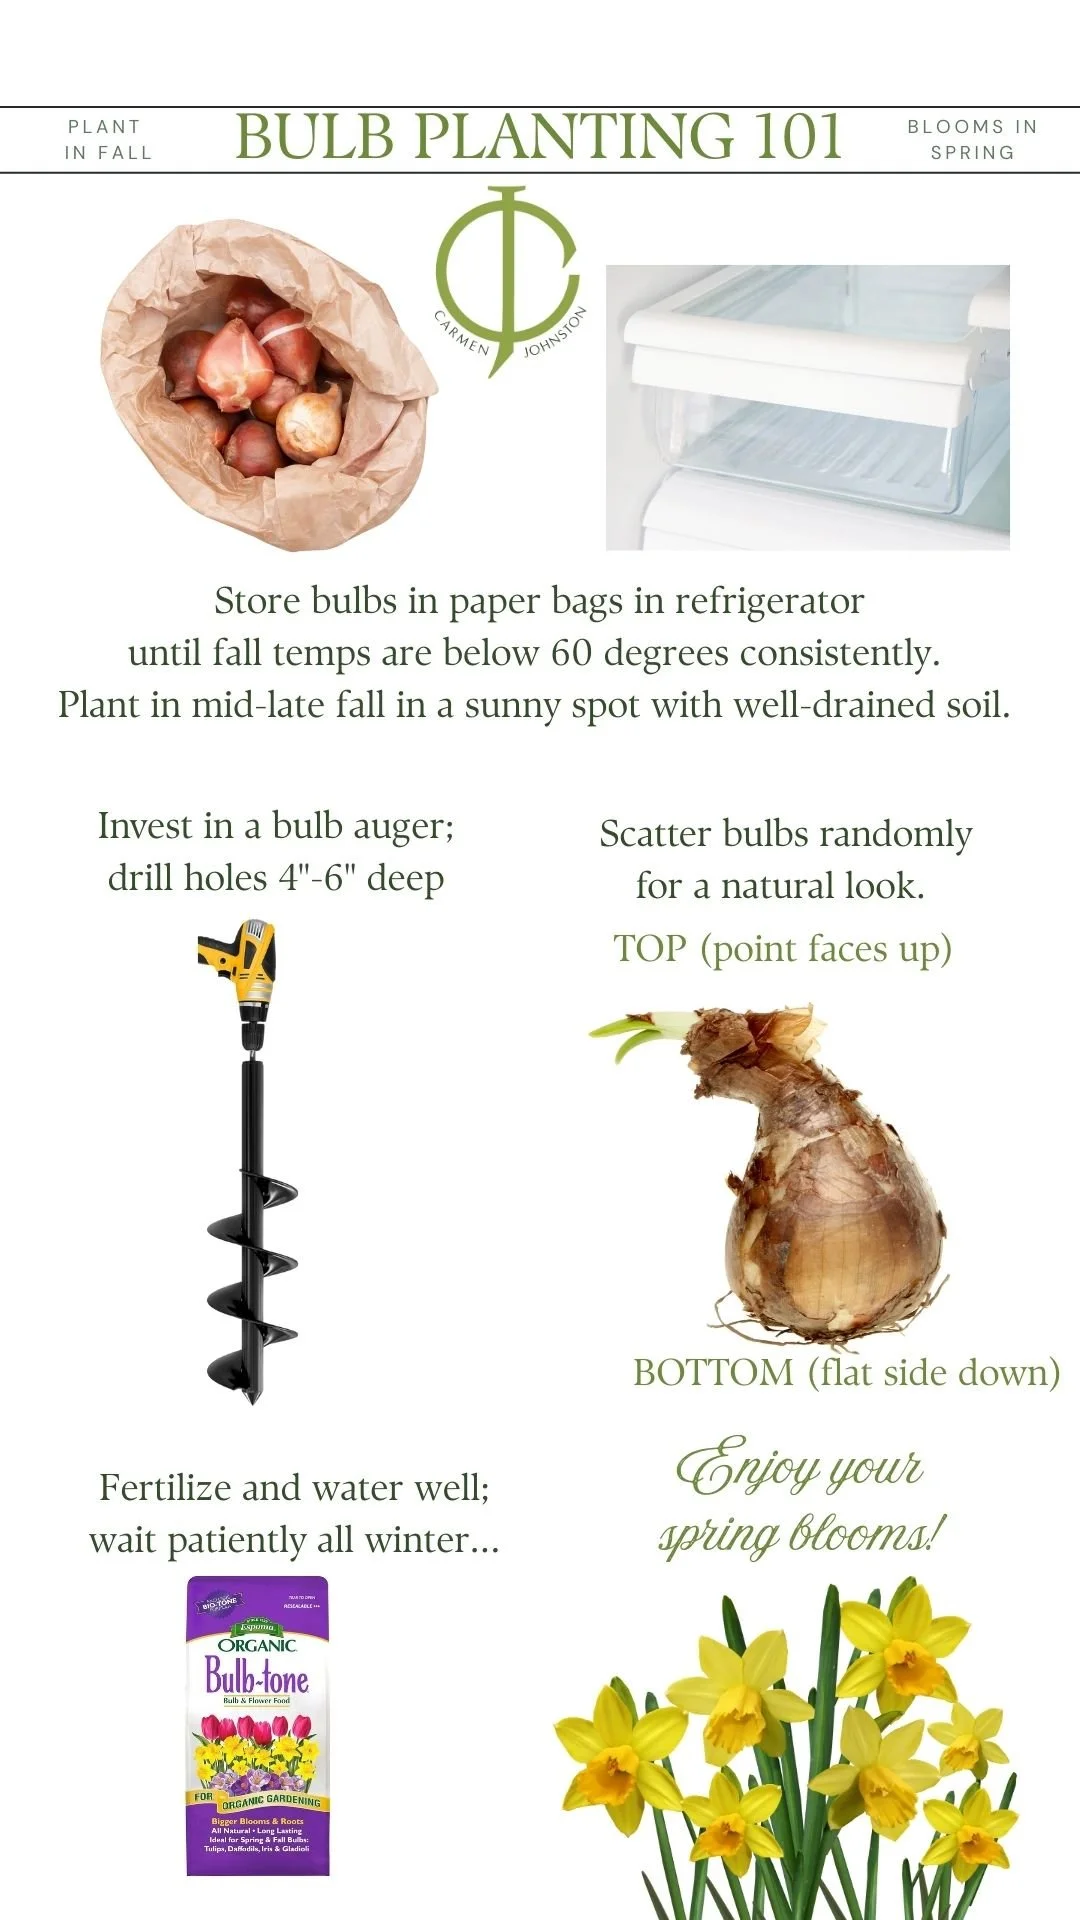
BULB PLANTING 101:
AT A GLANCE
Store in paper bags in the refrigerator until ready to plant in fall
Invest in a good cordless drill and bulb auger
Scatter bulbs randomly for a natural look
Plant bulbs 4”-6” deep (aim for 3x the height of the bulb)
Points face up, flatter sides face down
Fertilize with BulbTone and water bulbs well so they establish good roots
Wait patiently all winter….
ENJOY YOUR SPRING BLOOMS!
BULB PLANTING 101: In-Depth
Step One: Buy Your Bulbs Now and Store Them Right
I always tell folks to go ahead and buy your bulbs now in late summer, while the selection is plentiful and the colors you want are still in stock. But don’t plant them just yet. Most bulbs need cooler soil temps to really thrive, and August is not the time to plant with the threat of heat still looming. Tap here for one of my favorite places to buy bulbs.
Here’s my trick: store your bulbs in a paper bag (not plastic!) in your refrigerator’s crisper drawer until your soil temps are consistently below 60 degrees. In the South, that usually means planting in late October to November, depending on your zone.
Zone 4-6, gardeners can start sooner - late September to late October, ( watch your temps!)
Zones 7-8, wait until late fall- usual mid to late November.
Zone 9 or warmer, Refrigerate bulbs for about 6 weeks before planting early next year.
Step Two: Don’t Overthink Your Layout
One of my favorite tricks came straight from the old-school landscape crews that I’ve worked with over the years. Instead of planting in stiff little militant rows, toss your bulbs out across the garden bed and plant them wherever they land.
Yes, you heard me right.
I mean literally throw them out by the handful and let them fall where they may, then dig your holes exactly where they land. It may feel a little chaotic, but Mother Nature never grows in a straight line, and your beds will look more organic and naturally fuller come spring.
Step Three: Use the Right Tools to make it easier
If you’re planting more than just a few bulbs, do yourself a favor and grab a bulb auger and drill combo. It’s the fastest and easiest way to make perfect holes without wrecking your back or your manicure.
But, be careful when using a drill and auger… If you hit hard ground, rocks, or tree roots, the auger can stop suddenly while the drill keeps twisting, causing your arm to twist as well.
Save your elbows! Use a low setting and go slower if you’re not in a raised bed with loose soil.

My Gardening Secret Weapon!
One of my favorite tools to use in the garden is a cordless drill with an auger attachment. Not only does it make short work of bulb planting, but I also use it to plant my annuals each year! SO EASY!
I’ll drop my favorite product links here:
👉 Best Bulb Auger
👉 My Favorite Cordless Drill
Come see it in action…
BUDGET SAVING TIP: If you’re looking for something more budget-friendly, the Bulb Weasel is another good option. It requires a bit more manual labor, but it gets the job done faster than digging by hand. Perfect for smaller spaces or if you just want a little workout while you plant.👉 Bulb Weasel
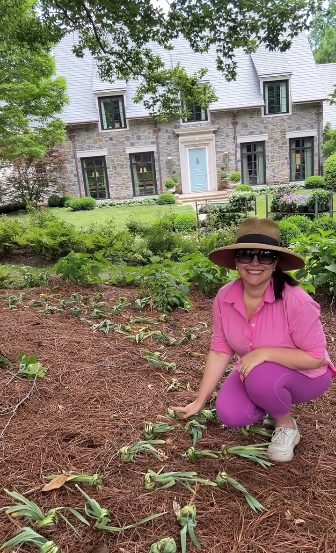
Step Four: Plant Your Bulbs
Plant the bulbs in a sunny spot with well-drained soil. The plants will need some full sun to bloom properly. If they are planted in too much deep shade they likely will not produce flowers.
Each bulb comes with instructions, but as a general rule of thumb you should dig a hole that is 3x the height of your bulb. So a 2” bulb needs a 6” deep hole to be fully supported but not buried too deep.
Make sure the flat end of the bulb goes down and the pointy end goes up. Drop them into the hole and cover them back up with loose soil.
Step FIve: Don’t forget to Feed
Once your bulbs are tucked in, go ahead and sprinkle in some Bulb-tone fertilizer. I like to mix it in the hole or dust it across the top of the bed before covering the bulbs with soil. This gives your bulbs a little extra boost to grow strong roots over the winter and really bloom big in spring.
Use it once at planting, and that’s all they need until they start pushing through the ground next year.
👉 Buy Bulb-tone Fertilizer
Step Six: Fertilize, Water and Wait
After planting and fertilizing, give your bulbs a nice, deep watering. You want to settle the soil around them and help that root growth get started before winter sets in.
I like to put a thick layer of mini-nugget mulch over the bulbs, but that isn’t a requirement.
And that’s it, y’all. Sit back over the winter and wait for the first bulbs to begin sprouting in a few months. In just a few hours of planting this fall, you’ll be setting the stage for one of the most joyful shows your garden can put on come spring. Start now, and you’ll be so glad you did when those first blooms start to pop!
My favorite bulbs…
Here are some of my most favorite varieties that I’ve used in my own garden!
(Seriously Tommy and I planted 5,000 of these daffodils once and they still come back year after year!)

My Favorite Daffodil Bulbs (and where to buy)
What should you do with Daffodils after they finish blooming?
Should you cut back daffodils after they finish blooming? Watch this video to find out my unique advice!
🌷 What Types of Fall Bulbs to Plant for Spring Blooms
These bulbs absolutely must be planted in the fall, while the soil is still workable but starting to cool:
1. Tulips
Come in hundreds of colors and styles
Plant in well-drained soil
2. Daffodils (Narcissus)
Bright and cheerful, deer and rodent resistant
Naturalize well, so they come back every year
3. Hyacinths
Fragrant and compact
Great in containers or borders
4. Crocus
One of the earliest bloomers, Small but mighty pops of color
Perfect for lawns, rock gardens, and walkways
5. Grape Hyacinths (Muscari)
Tiny blue or purple flowers that look like little grapes
Pair beautifully with daffodils and tulips
Naturalize easily
🌷 Are Tulips and Daffodil Bulbs Perennial?
Yes, all of these bulbs are perennial and should come back year after year if the conditions are right. Tulips are a bit pickier and may fade out eventually, but daffodils are historically strong bloomers that will multiply over time!
Tips to Encourage Multiplying:
Choose a sunny spot with well-drained soil
Avoid cutting back foliage too soon — wait until it dies back naturally
Add a bit of Bulb-tone fertilizer at planting and again after blooming
Happy Bulb Planting!

Shop my Amazon Favorites!
Shop my Amazon storefront for chic + practical finds to pretty up your home inside and out! Every pick is personally bought and tested by me—no false advertising, just fabulous finds you can trust!